UltiSnips 让 Vim 飞起来
可自定义模板, 然后输入:
KEY+TAB就可以插入模板了, 厉害的是可以预留几个光标跳转和替换文案的操作, 和高级的IDE没什么差别了
最近在整理 Linux 101 Hacks 系列章节, 发现有几个操作重复频率非常高
由于编辑文章默认使用的 vim, 操作起来还是有些不太方便, 于是搜索就 google 了一下, 发现了这个厉害的模板插件: UltiSnips
于是乎把重复且繁琐的步骤做成模板, 以后就又方便了许多, 嘿嘿…
Vundle
Vundle is short for Vim bundle and is a Vim plugin manager.
其实就是 VIM 的就是插件管理器了
安装 Vundle (Mac)
首先你的系统已经安装了 git, 这里就不介绍了. Git下载页面
安装 Vundle:
$ git clone https://github.com/VundleVim/Vundle.vim.git ~/.vim/bundle/Vundle.vim
配置插件
把下面的内容放到 ~/.vimrc 最前面
set nocompatible              " be iMproved, required
filetype off                  " required

" set the runtime path to include Vundle and initialize
set rtp+=~/.vim/bundle/Vundle.vim
call vundle#begin()
" alternatively, pass a path where Vundle should install plugins
"call vundle#begin('~/some/path/here')

" let Vundle manage Vundle, required
Plugin 'VundleVim/Vundle.vim'

" ################################# other plugins here

" #################################

" All of your Plugins must be added before the following line
call vundle#end()            " required
filetype plugin indent on    " required
" To ignore plugin indent changes, instead use:
"filetype plugin on
"
" Brief help
" :PluginList       - lists configured plugins
" :PluginInstall    - installs plugins; append `!` to update or just :PluginUpdate
" :PluginSearch foo - searches for foo; append `!` to refresh local cache
" :PluginClean      - confirms removal of unused plugins; append `!` to auto-approve removal
"
" see :h vundle for more details or wiki for FAQ
" Put your non-Plugin stuff after this line
安装插件
2种方式都可以:
- 使用
vim test随便打开个文件, 然后:PluginInstall等待一会儿即可 - 直接使用命令行方式:
vim +PluginInstall +qall
UltiSnips
上面已经安装了 Vundle, 下面就非常简单了, 打开 ~/.vimrc, 把这两个插件丢进去就可以了
" ################################# other plugins here
Plugin 'SirVer/ultisnips'
Plugin 'honza/vim-snippets'
" #################################
第一个插件就是我们的模板引擎了
第二个则是人家已经做好的一堆现成的模板集合, 主流的语言都支持了
来几个例子就上手了:
示例1. 插入日期: date + tab

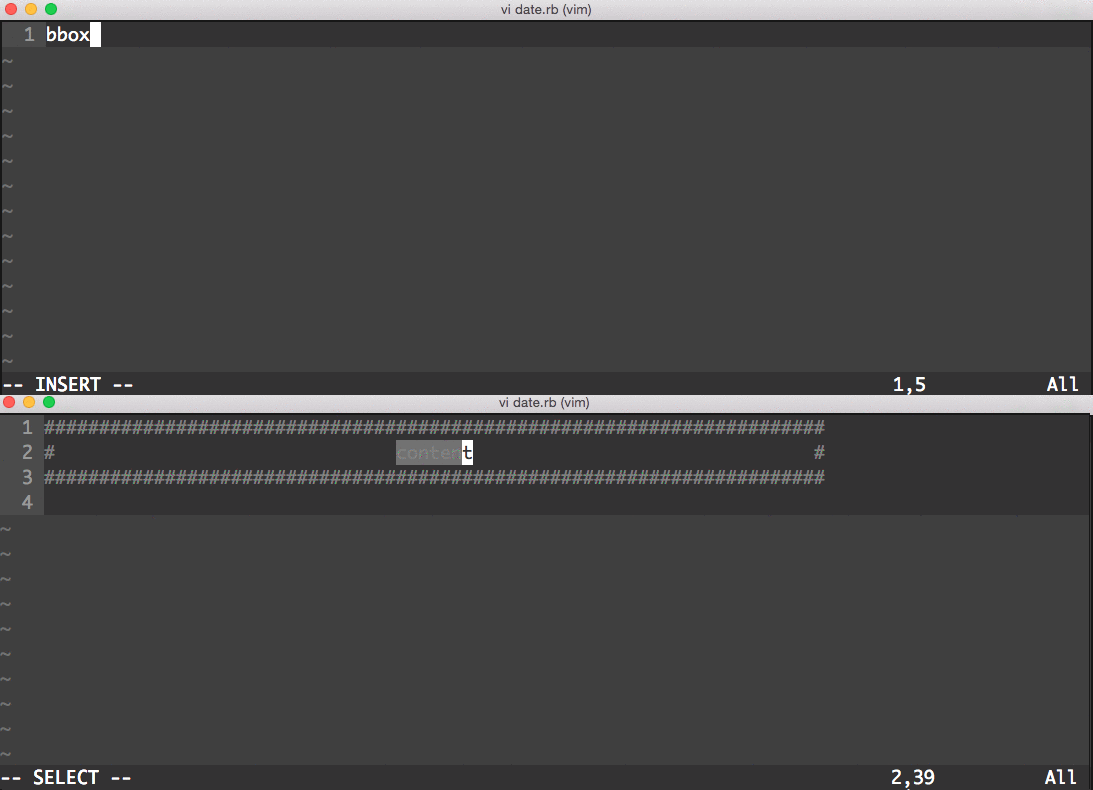
示例2. 插入注释块: bbox + tab

是不是非常棒
自定义模板
模板介绍
~/.vim/bundle/vim-snippets/UltiSnips/ 文件夹下面就放了非常多的已经定义好的模板
我们可以找几个打开看看, 参考一下语法, 这里以 markdown.snippets 为例:
插入图片的模板
snippet img "Image"
$0
endsnippet
说明:
snippet- 模板开始endsnippet- 模板结束img- 模板触发的keyImage- 模板备注说明, 给自己看的$0- 模板内容, 里面有光标和提示备注
模板内容详解:
$1- 触发模板后, 光标第一个出现的位置${1:pic alt}- 如果带大括号, 则可以在位置后面加上提示备注, 光标如果移动到该位置, 备注自动全选, 以方便快速修改$2...$n- 光标的第2...n的位置, 和$1功能一样, 只是顺序不一样${3/.+/ "/}${3:opt title}${3/.+/"/}- 这里相当于有3个$3, 输入的时候如果中间的内容最终被删除了, 那么两边的双引号会被一起删除掉$0- 光标最后一次跳转所处的位置CTRL+J- 光标调整到下一位置的 快捷键:$1 -> $2 -> ... -> $n -> $0
如此, 这里的模板插入功能就非常强大了
DIY自己的模板
模板可以嵌入的 NB 之处是还可以嵌入 脚本, 比如: bash, python 等等, 这里没有深入研究了, 目前的已经够用了
# UltiSnips 插件会自动加载这个文件夹下的文件
$ mkdir ~/.vim/UltiSnips

# 创建 markdown 的模板文件
touch ~/.vim/UltiSnips/markdown.snippets
自定义直接的模板内容, 这里可以吧直接常用的加进来, 使用起来就方便很多了
~/.vim/UltiSnips/markdown.snippets
snippet code "Inline Code" i
\`$1\`$0
endsnippet

snippet code_bash "Bash Code Block" b
\`\`\`${1:bash}
$2
\`\`\`
$0
endsnippet

snippet eg "Example of Bash Code Block" b
${1:示例}: ${2:简要说明}
\`\`\`bash
$ $3
\`\`\`
$0
endsnippet

snippet list "List items" b
${1:title}:
- \`${2:item}\` - ${3:说明}
- \`${4:item}\` - ${5:说明}
$0
endsnippet

snippet more "list more other read links" b
${1:更多}:
- [$2]($3)
- [$4]($5)
$0
endsnippet
如此, 在写 jekyll 文章的时候就会方便很多, 可以提高不少的效率!!!
而之前的做法比较土, 先写个大概的模板, 用的时候 copy 过来, 然后在改的; 使用高级模板之后, 感觉还是顺畅了不少
参考:
blog comments powered by Disqus